Monday, June 9, 2025

Crochet World Globe Pattern


This is the pattern I used to make this globe.

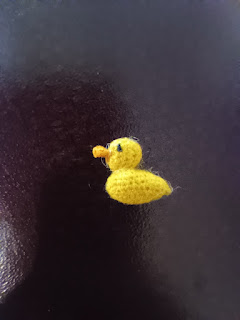
Microamigurumi Duck Pattern Idea


I made the pattern for this duck up. I never got it exactly how I wanted it, but here is a general idea of what I did for the next time I try to make a duck.

Body:
1. 8 SC in magic circle
2. (Sc, inc)*4 - 12
3. (2 sc, inc)*4 - 16
4-7. Sc around - 16
8. In the 1st stitch of each round from now on sl st + ch 1, then continue with pattern. 3 sc, Dec, 6 sc, 2 inc, 3 sc - 17
9. Sc, Dec, sc, Dec, 11 SC - 15
10. 3 Dec, 4 sc, Dec, 3 sc - 11
Stuff
11. 4 Dec, 3 sc - 7
12. Do not join. Ch 1, pinch top and bottom rows together and crochet through both top and bottom. 3 sc across
13. Ch 1, turn, 3 sc. Finish off

Head:
1. 8 SC in magic circle
2. (Sc, inc)*4 - 12
3. (2 sc, inc)*4 - 16
4-5. Sc around
6. (Sc, Dec)*4 - 12
7. Dec around until closed. Finish off

Bill:
In magic circle, sc 4
(2 hdc in 1st st, hdc in next)*2 -6

Crochet Penguin Pacifier Clip


I revised the penguin pattern from this pattern then added the strap and clip.


Penguin: In white
Ch 4
1. Beginning in 2nd ch, sc across - 3
2. Ch 1, turn, inc, sc, inc - 5
3. Ch 1, turn, 2 sc, inc, 2 sc - 6
4-9. Ch 1, turn, sc across - 6
10. Ch 1, turn, 3 dec - 3
11. Ch 1, turn, sc across - 3
12. Ch 1, turn, 3 inc - 6
13-15. Ch 1, turn, sc across - 6
16. Ch 1, turn, 1 sc, 3 dc in next st, 2 sc, 3 dc in next, 1 sc
17. This is the general pattern for single crocheting around the penguin: 4 sc, sl st (in narrow part of neck), (2 sc, inc)*3, (this should be working across the bottom:) inc, sc, inc, (inc, 2 sc)*3, sl st (in narrow part of neck), 4 sc, sl st in the base of row 16, finish off.

In black:
Joining in the sc after the sl st in the neck, 29 sc (this should bring you up to the sl st in the other side of the neck), sl st in sl st, 4 sc, 2 sc in next st, 2 hdc in next st, 2 dc in each of the next 2 st, (to make the peak, in the next 2 st dc, dc2tog, dc), 2 dc in each of the next 2 st), 2 hdc in next st, 2 sc in next st, sc in next 4 st, sl st in sl st and finish off.

Wings: In black
In 7th stitch from the narrow part of the neck, attach yarn with a slip stitch and chain 6.
Turn, sc in 4th ch from hook, hdc, 2 dc, (you will now be working in the actual penguin - and the next stitch will be made into the same stitch that you joined with a sl st in) 2 dc in each of the next 3 st, hdc in each of the next 2 stitches, sc, sl st, finish off.

Embroider on the eyes and beak

Strap: You can make the strap using any bookmark pattern. After you finish, attach the thread to the middle stitch, chain a chain long enough for the clip to fit through, then attach the end of the chain to the strap, creating a loop.

Attach the clip to the top of the head by sc across and through the clip rod.

Saturday, November 23, 2024

Microamigurumi Hot Dog Crochet Pattern


Supplies:
Size 12 crochet hook
Red and brown embroidery floss plus a little black for details
Needle   

Head:
1. 6sc in magic circle
2. (Inc, sc)*3 - 9
3. (Inc, 2 sc)*3 - 12
4-5. Sc around - 12
6. (Inc, 2 sc)*2, 6 sc - 14
7. (Inc, 3 sc)*2, 6 sc - 16
8. (Inc, 4 sc)*2, 6 sc - 18
9. (Inc, 5 sc)*2, 6 sc - 20
10-11. Sc around - 20
12. (Dec, 2 sc)*5 - 15
13. (Dec, sc)*5 - 10
14. Dec around until closed

Ears: Make 2
1. 6 sc in magic circle
2. (Inc, sc)*3 - 9
3-5. Sc around - 9
6. (Dec, sc)*3 - 6
7-8. Sc around - 6
Finish off

I modified this pattern to make my "hot-dog". :-) 
Body:
1. 5 sc in magic circle
2. Inc in each st - 10
3. (Inc, sc)*5 - 15
4. (Inc, 2 sc)*5 - 20
5-20. Sc around - 20
21. (Dec, 2 sc)*5 - 15
22. (Dec, sc)*5 - 10
23. Dec around until closed

Tail:
Make a magic circle, ch 2, then 12 dc into magic circle.
Join to ch 2 and finish off.
Pull really tight so it buckles like a sausage casing end.

Bun: in tan
Ch 13
1. Beginning 2nd ch from hook, sc 11, inc in last stitch, sc 11 in the back loops 
*After round 2, measure the bun against the dog to see if it's long enough. You may want to add or take away from the starting chain to fit your dog better.*
2-20. Sc around - 22
*How far you want your bun to wrap around the dog is up to you - you can add it subtract rounds as desired.*
Finish off and sew shut

Assemble the dog then add the legs.

Legs: Make 4
Below is the original pattern. I ended up just making a bobble directly on the body for each leg because it was such a small piece to work with
(1. 4 sc in magic circle
2. (Inc, 2 sc)*2 - 6
3-4. Sc around - 6
Finish off)

When the dog is completely assembled, embroider yellow and red thread for ketchup and mustard.

Wednesday, November 20, 2024

Tuesday, November 19, 2024

Microamigurumi Horse Crochet Pattern


This pattern is from crochetville.com. I altered the ears and opted to not make a saddle or harness.

Supplies:
Size 12 crochet hook
Light brown and black embroidery floss
Needle 

Head:
The end of each round is joined with a slip stitch to the first stitch made
Rnd 1: 6 sc in a magic circle
Rnd 2-3: Sc around - 6
Rnd 4: ch 1, sc in first 2 sc, inc in next 3 sc, sc in last sc - 9
Rnd 5: ch 1, sc in first 2 sc, inc in next 6 sc, sc in last sc - 15
Rnd 6-9: ch 1, sc around - 15
Stuff head
Rnd 11: ch 1, dec around - 5
FO leaving long tail. Use tail to close hole.

Ears: (make 2)
Ch 4, sc in 3rd st from hook, dc in last stitch, finish off

Neck:
Leave a long starting tail. This is the end that is sewn to horses head.
The end of each round is joined with a slip stitch to the first stitch made
Chain 11, join with slip stitch to first chain
Rnd 1: ch 1, sc in each chain around - 11
Rnd 2-3: ch 1, sc around - 11
Rnd 4: ch 1, (inc, sc)*5, sc in last sc - 16
FO leaving long tail. This is the end that is sewn onto the horse's body.

Body:
The end of each round is joined with a slip stitch to the first stitch made
Rnd 1: 6 sc in magic circle
Rnd 2: ch 1, inc around - 12
Rnd 3: ch 1, (inc, sc)*6 - 18
Rnd 4-5: ch 1, sc around - 18
Rnd 6: ch 1, (dec, sc)*6 - 12
Rnd 7: ch 1, sc around - 12
Rnd 8: ch 1, (inc, sc)*6 - 18
Rnd 9-10: ch 1, sc around - 18
Rnd 11: ch 1, (dec, sc)*6 - 12
Stuff body
Rnd 12: ch 1, dec around - 6
FO leaving long tail. Use tail to sew hold closed.
Stuff neck and sew to horse's body.

Legs: (make 4)
The end of each round is joined with a slip stitch to the first stitch made
Using contrast hoof color,
Rnd 1: 6 sc in magic circle
Rnd 2: IN BACK LOOPS ONLY. ch 1, sc around - 6
FO and switch to main color
Rnd 3-6: sc around - 6
Finish off leaving long tail.
Sew legs to body

Mane:
You will need several pieces of thread, cut into approx. 1 inch pieces. Each piece of yarn will act as 2 strands of hair.
Insert hook into horses head. Grab middle of yard strand with hook and pull through stitch, ( Like you would latch hook) making a small loop. Pull both free ends of yarn strand through loop, pulling tight to secure hair.
You will continue to do this down back of horses neck.
Trim hair evenly, or as desired.
Sew eyes on.

Sunday, March 3, 2024

Miniamigurumi Grand Piano Crochet Keychain Pattern


This piano is based off this Etsy pattern. The pattern didn't have good assembly instructions and I had to alter the keyboard part of the pattern to fit my mini piano.

Supplies:
Black embroidery floss
Gold (or maroon) embroidery floss
White embroidery floss
Approx. 4x4 inch thin leather (or something to keep the piano stiff but is also washable)
Pipecleaner for stick and around sides of piano base
Keychain ring

Cover: (When it's finished, this makes a pocket to insert a little piece leather to keep it stiff. More details below.)
Using black yarn, ch 9,
Rnd 1: Sc into the 2nd ch from the hook, sc in next 6 ch, 3 sc in next sc, (working in the back of the ch), sc in next 6 sc, 2 sc in the next ch, sl st into the first sc. (18)
Rnd 2: Ch 1, [sc in next 8 sc, 2 sc in next sc] repeat twice, sl st into the first sc. (20)
Rnd 3: Ch 1, [sc in next 9 sc, 2 sc in next sc] repeat twice, sl st into the first sc. (22)
Rnd 4: Ch 1, [sc in next 10 sc, 2 sc in next sc] repeat twice, sl st into the first sc. (24)
Rnd 5: Ch 1, sc in each sc around, sl st into the first sc. (24)
Rnd 6: Ch 1, [sc in next 11 sc, 2 sc in next sc] repeat twice, sl st into the first sc. (26)
Rnd 7-10: Ch 1, sc in each sc around, sl st into the first sc. (26)
Rnd 11: Ch 1, sc in next 12 sc, 2 sc in next sc, sc in next 13, sl st into the first sc. (27)
Rnd 12: Ch 1, sc in next 13 sc, 2 sc in next sc, sc in next 13, sl st into the first sc. (28)
Rnd 13: Ch 1, sc in next 13 sc, 3 sc in next sc, 14 sc, sl st into the first sc. (30)
Rnd 14: Ch 1, sc in next 14 sc, 3 sc in next sc, sc in next 15, sl st into the first sc. (32)
Rnd 15: Ch 1, sc in next 15 sc, 3 sc in next sc, sc in next 16, sl st into the first sc. (34)
Rnd 16: Ch 1, sc in next 16 sc, 3 sc in next sc, sc in next 17, sl st into the first sc. (36)
Rnd 17: Ch 1, sc in next 17 sc, 3 sc in next sc, sc in next 18, sl st into the first sc. (38)
Rnd 18: Ch 1, sc in next 18 sc, 3 sc in next sc, sc in next 19, sl st into the first sc. (40)
Rnd 19-20: Ch 1, sc in each sc around, sl st into the first sc. (40)
Rnd 21: Ch 1, sc in next 19 sc, 3 sc in next sc, sc in next 20, sl st into the first sc. (42)
Rnd 22-30: Ch 1, sc in each sc around, sl st into the first sc. (42)
Leave a long tail and finish off.


Outer Piano Base:
Using black yarn, ch 10,
Rnd 1: sc into the 2nd ch from the hook, sc in next 6 sc, 2 sc in next sc. (9)
Rnd 2: Ch 1, turn, 2 sc in next sc, sc in next 8 sc. (10)
Rnd 3: Ch 1, turn, 2 sc in next sc, sc in next 9 sc. (11)
Rnd 4: Ch 1, turn, 2 sc in next sc, sc in next 10 sc. (12)
Rnd 5: Ch 1, turn, sc in each sc. (12)
Rnd 6: Ch 1, 2 sc in next sc, sc in next 11 sc. (13)
Rnd 7-10: Ch 1, turn, sc in each sc. (13)
Rnd 11: Ch 1, turn, 2 sc in next sc, sc in next 12 sc. (14)
Rnd 12: Ch 1, turn, sc in next 13 sc, 2 sc in next sc. (15)
Rnd 13: Ch 1, turn, 2 sc in next sc, sc in next 14 sc. (16)
Rnd 14: Ch 1, turn, sc in next 15 sc, 2 sc in next sc. (17)
Rnd 15: Ch 1, turn, 2 sc in next sc, sc in next 16 sc. (18)
Rnd 16: Ch 1, turn, sc in next 17 sc, 2 sc in next sc. (19)
Rnd 17: Ch 1, turn, 2 sc in next sc, sc in next 18 sc. (20)
Rnd 18: Ch 1, turn, sc in next 19 sc, 2 sc in next sc. (21)
Rnd 19-30: Ch 1, turn, sc in each sc. (21)
Continue down the side of the piano cover...crocheting in the end of the rows...
Rnd 31: Ch 1, sc around (approximately 90 sc - dow. 30 rows, 9 st in beginning row, up 30 rows, 21 st across row 30), sl st into the first sc. (Approx. 90)
Rnd 32-38: Ch 1, sc in each sc around, sl st into the first sc. (Approx. 90)
Finish off, but leave a very long tail.

Inner Piano Base:
Using gold yarn, Ch 7,
Rnd 1: sc into the 2nd ch from the hook, sc in next 4 ch, 2 sc in next sc. (7)
Rnd 2: Ch 1, turn, 2 sc in next sc, sc in next 6 sc. (8)
Rnd 3: Ch 1, turn, 2 sc in next sc, sc in next 7 sc. (9)
Rnd 4: Ch 1, turn, 2 sc in next sc, sc in next 8 sc. (10)
Rnd 5: Ch 1, turn, sc in each sc. (10)
Rnd 6: Ch 1, turn, 2 sc in next sc, sc in next 9 sc. (11)
Rnd 7-10: Ch 1, turn, sc in each sc. (11)
Rnd 11: Ch 1, turn, 2 sc in next sc, sc in next 10 sc. (12)
Rnd 12: Ch 1, turn, sc in next 11 sc, 2 sc in next sc. (13)
Rnd 13: Ch 1, turn, 2 sc in next sc, sc in next 12 sc. (14)
Rnd 14: Ch 1, turn, sc in next 13 sc, 2 sc in next sc. (15)
Rnd 15: Ch 1, turn, 2 sc in next sc, sc in next 14 sc. (16)
Rnd 16: Ch 1, turn, sc in next 15 sc, 2 sc in next sc. (17)
Rnd 17: Ch 1, turn, 2 sc in next sc, sc in next 16 sc. (18)
Rnd 18: Ch 1, turn, sc in next 17 sc, 2 sc in the next sc. (19)
Rnd 19-27: Ch 1, turn, sc in each sc. (19)
Continue down the side of the piano inside...crocheting in the end of the rows...
Rnd 28: Ch 1, sc around (approximately 83 sc - down 29 rows, 6 st in beginning row, up 29 rows, 19 st across row, sl st into the first sc. (Approx. 83)
Rnd 29-32: Ch 1, sc in each sc around, sl st into the first sc. (Approx. 83)


Assembly Part 1:
After the cover, outer base, and inner base are finished, cut a small piece of leather to fit inside the cover and a small piece to fit between the outer and inner layers of the piano. (It helps to use the bottom of the piano base as a guide while cutting the leather.)
This is the leather piece I cut out for the cover

Insert the leather into the cover and whipstitch the cover shut.
Insert the leather into the bottom of the outer base, place the inner base on top of it, and begin to sew the pieces together with the tail of the outer base. As you sew it together, insert a pipecleaner around the sides of the piano. (This will help the sides stay in the correct shape.)

Keyboard Base: In Black
After adding the leather insert and sewing the inside to the outer part of the piano, you can make the piano keyboard.
Rnd 1: Flip the piano upside down and, now working from the right corner of row 31, 19 sc across. (You kind of have to crochet the stitches in the post of the rows.)


Rnd 2-5: ch 1, turn, sc across (19)
Finish off, but leave a tail. Use the tail to sew the edges of the keyboard up to the front of the piano to create sides.


Keys:
Using white thread, Ch 4
Rnd 1: Skip 1st sc, sc in next 3 st
Rnd 2-15: ch 1, turn, 3 sc (3)
Finish off
The white keys will be held on by sewing the black keys. Arrange the keys on top of the black base you crocheted. Then, in black, sew the black keys. I was only able to fit about 2 1/2 octaves on my piano...

Legs: (make 3)
Rnd1. 4 sc in magic circle
Rnd 2. Inc around (8)
Rnd 3-9. Sc around (8)
Finish off and sew on


Stick for Cover:
1. 4 sc in magic circle
2. Inc around (8)
3-11. Sc around (8)
Add pipe cleaner and sew closed.

Assembly Part 2:
Sew the legs onto the bottom of the piano base (2 in front and 1 in the back)
Sew the stick onto the front of the base
Sew the cover along the side of the base
Then sew the top of the stick onto the cover.
Add the keychain and finish off.