Monday, July 21, 2025

Microamigurumi Succulent Plant and Pot Crochet Pattern

I revised this pattern to make my potted succulent.


Supplies:
Size 12 crochet hook
Caramel color embroidery floss
Green embroidery floss
Very small amount of stuffing
Ring

Single crochet spike stitch (SPsc): Insert hook in indicated stitch, draw up a loop to the height of the stitches of the working round, yarn over, pull yarn through both loops on hook.


Pot: Caramel color
1 - 7 Sc in magic circle
2 - Inc around - 14
3 - BLO, (inc, sc)*7 - 21
(In the next round, we begin alternating single crochet and spike single crochet (Spsc) stitches. All spike stitches are worked into the round below.)
4 - In both loops, (Sc, Spsc)*10, Sc - 21
5 - (Spsc, sc)*10, Spsc - 21
6 - (Sc, Spsc)*10, sc - 21
7 - (Spsc, Sc)*10, Spsc - 21
8 - (Sc, Spsc)*10, Sc - 21
9 - (Spsc, Sc)*10, Spsc - 21
Finish off

Plant: In green,  about 11 leaves
Chain 5
In 2nd ch from hook, (sl st, ch 1, hdc, dc), in next st (dc, hdc, ch, sl st), (sl st, ch 1, hdc, dc), (dc, hdc, ch 1, sl st) - you now have 2 leaves.

The rest of the plant is a little tricky, but easier in practice than to explain. Fold/roll the leaves into the final position you will want them in, then, instead of working in normal rounds, the rest of the stitches will be worked into the base of the leaves. It's pretty much at your discretion where you want the base of the next leaf located. Also, you can adjust how many leaves you make.

[(Sl st, ch 1, hdc, dc), (dc, hdc, ch 1, sl st)]*4
[(Sl st, ch 1, dc, tc), (tc, dc, ch 1, sl st)]*5
Finish off
(It may be a bit hard to distinguish between the leaves, but when you sew the plant onto the pot, the leaves pull away from each other and there's more texture to them.)
Sew the ring onto the top of the plant
Stuff pot and sew on plant

Thursday, July 17, 2025

Microamigurumi Pencil Crochet Pattern


You will need pink, grey/silver, yellow, tan, and black embroidery floss
Size 12 crochet hook

Starting at the eraser of the pencil:
In pink
1. 6 sc in magic circle
2-3. Sc around - 6.
Switch to grey
4. Sc around - 6
Switch to yellow
5-14. Sc around
Switch to tan
15. Sc around - 6
16. Sc2tog around - 3
17. Sc3tog, finish off
Using black thread, embroider the point of the pencil

Monday, June 9, 2025

Crochet World Globe Pattern


This is the pattern I used to make this globe.

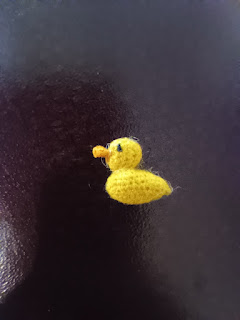
Microamigurumi Duck Pattern Idea


I made the pattern for this duck up. I never got it exactly how I wanted it, but here is a general idea of what I did for the next time I try to make a duck.

Body:
1. 8 SC in magic circle
2. (Sc, inc)*4 - 12
3. (2 sc, inc)*4 - 16
4-7. Sc around - 16
8. In the 1st stitch of each round from now on sl st + ch 1, then continue with pattern. 3 sc, Dec, 6 sc, 2 inc, 3 sc - 17
9. Sc, Dec, sc, Dec, 11 SC - 15
10. 3 Dec, 4 sc, Dec, 3 sc - 11
Stuff
11. 4 Dec, 3 sc - 7
12. Do not join. Ch 1, pinch top and bottom rows together and crochet through both top and bottom. 3 sc across
13. Ch 1, turn, 3 sc. Finish off

Head:
1. 8 SC in magic circle
2. (Sc, inc)*4 - 12
3. (2 sc, inc)*4 - 16
4-5. Sc around
6. (Sc, Dec)*4 - 12
7. Dec around until closed. Finish off

Bill:
In magic circle, sc 4
(2 hdc in 1st st, hdc in next)*2 -6

Crochet Penguin Pacifier Clip


I revised the penguin pattern from this pattern then added the strap and clip.


Penguin: In white
Ch 4
1. Beginning in 2nd ch, sc across - 3
2. Ch 1, turn, inc, sc, inc - 5
3. Ch 1, turn, 2 sc, inc, 2 sc - 6
4-9. Ch 1, turn, sc across - 6
10. Ch 1, turn, 3 dec - 3
11. Ch 1, turn, sc across - 3
12. Ch 1, turn, 3 inc - 6
13-15. Ch 1, turn, sc across - 6
16. Ch 1, turn, 1 sc, 3 dc in next st, 2 sc, 3 dc in next, 1 sc
17. This is the general pattern for single crocheting around the penguin: 4 sc, sl st (in narrow part of neck), (2 sc, inc)*3, (this should be working across the bottom:) inc, sc, inc, (inc, 2 sc)*3, sl st (in narrow part of neck), 4 sc, sl st in the base of row 16, finish off.

In black:
Joining in the sc after the sl st in the neck, 29 sc (this should bring you up to the sl st in the other side of the neck), sl st in sl st, 4 sc, 2 sc in next st, 2 hdc in next st, 2 dc in each of the next 2 st, (to make the peak, in the next 2 st dc, dc2tog, dc), 2 dc in each of the next 2 st), 2 hdc in next st, 2 sc in next st, sc in next 4 st, sl st in sl st and finish off.

Wings: In black
In 7th stitch from the narrow part of the neck, attach yarn with a slip stitch and chain 6.
Turn, sc in 4th ch from hook, hdc, 2 dc, (you will now be working in the actual penguin - and the next stitch will be made into the same stitch that you joined with a sl st in) 2 dc in each of the next 3 st, hdc in each of the next 2 stitches, sc, sl st, finish off.

Embroider on the eyes and beak

Strap: You can make the strap using any bookmark pattern. After you finish, attach the thread to the middle stitch, chain a chain long enough for the clip to fit through, then attach the end of the chain to the strap, creating a loop.

Attach the clip to the top of the head by sc across and through the clip rod.